
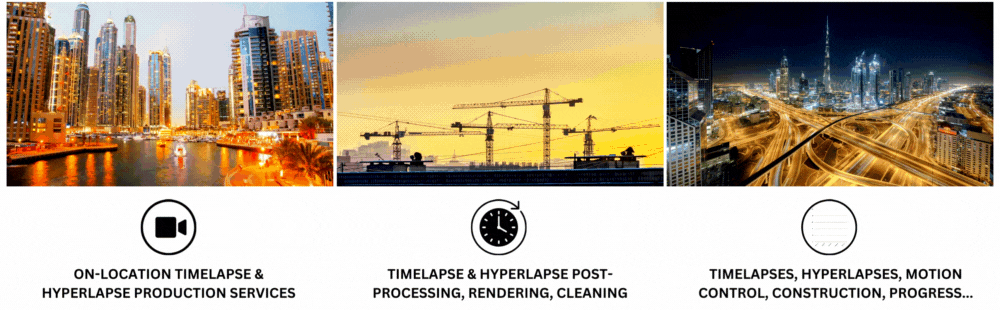
With time-lapse video, you get to see accelerated motion and incredibly showcase your projects! Here at Studio52, we use the best techniques and equipment to capture long-term duration processes and display them in high-quality video snippets.
Timelapse videos display your entire construction project from start to finish in just a few minutes — exactly why it’s one of the best tools for marketing and promotion. We have created world-class timelapse videos for brands such as Expo 2020, Meraas, Damac, and many more!
Today we want to outlay what you should look for in cameras and what is the best timelapse camera for the construction industry in 2023!
Table of Content
What Is Construction Timelapse Video?
When you’re shooting a standard video, your camera takes somewhere between 24 and 30 frames a second. This is the usual fps metric for your normal camera. With time-lapse video, however, your camera snaps pictures much less frequently, at the rate of one photo a minute sometimes.
This way you get a collection of thousands of pictures, when compressed and played look like a dynamic video, and what’s been photographed for months gets squeezed into one to two-minute segments — essentially, a time-lapse video!
Time-lapse videos are such powerful construction business promotional tools because they can showcase entire projects to the audience in just a few seconds and pique their interest.
Why Do You Need It?
Longterm construction timelapse videos are essential tools for any serious business and its marketing and growth efforts. Let’s number down just a few reasons.
They showcase progress
People are hooked when they see something moving forward and the scenery changing for the better. That’s what makes these videos such great attention grabbers. However, they’re used to show the progress to your team and make them motivated and happy about taking part. They’re perfect to supplement or even substitute written reports for your shareholders and stakeholders.
They’re sharable
Construction timelapse videos are perfect for sharing on social media and in your community. First, they show how you’re doing things day in and out. Secondly, they’re so easy to share and skyrocket your organic traffic and marketing, inciting even more interest and attracting even more business.
They are perfect for documentation
Time-lapse videos graphically document your project in a way that’s not only interesting internally. You can share this video with the client too, and showcase how their project has come along — project documentation is one thing, but seeing the time-lapse of it is priceless.
Can be used in various ways
Time-lapse construction videos can be used in a series of ways. They’re not only for internal use and can be shared across the platforms to strengthen your marketing efforts. They can help you stand out from the crowd and bring in new prospective clients.
You can use them at exhibitions and events. Playing a time-lapse on a video wall where you present your company creates a strong PR and makes your selling game stronger than ever.
Challenges Of Time-Lapse Videos For Construction?
Construction time-lapse videos have their own set of drawbacks and ways they’re being shot and produced. If you feel unsafe about it, it’s always best to go with pros to help you out.
Here, at Studio52, we’ve created dozens of perfect progress timelapse video that have helped our clients grow their businesses. Some of our most valuable works were created for prominent clients in the region such as Expo 2020, Meraas, Adnoc, Damac, and others.
Okay, so what are the challenges we’re talking about?
Time-lapse videos aren’t an easy game and there are many adversities you’ll face when creating one. These often include:
- Battling poor weather, such as rain or snow
- Dealing with a poor signal at construction sites
- Cameras can get stolen
- It’s a challenge to keep cameras powered and working 24/7
- High quality is a must
For all of these, and many more, you’d want to talk to pros about handling the job!
Okay, so how do we choose the best timelapse camera around? Let’s define some features first.
Must-Have Features
You want your camera to be as stable and as functioning as can be at all times and in all weather conditions. That’s why you cannot go with any standard camera, but a specialized device.
What should such a device have you ask? Let’s number down a few features a time-lapse camera must have. Goes without saying that a time-lapse function is a must! But here are some worthy functions:
Clarity of resolution
You want your videos to be high quality and this is where pixels come in. Ideally, you’d want your camera to have as many megapixels, and 12 is a sweet spot. Once you start filming there are no cutting scenes or tearing down of the buildings to shoot over. You should strive to take high-quality pictures right from the get-go, so the camera of choice should resonate with that.
Long power and duration
Your camera should have sturdy charging options and batteries. If you’re down with a single battery and you have to wait hours before it charges, a serious amount of footage will never be taken. Try and find an external power supply or solar panels that can keep the camera going for days on end.
Waterproof and durable
Taking pictures outside in the field, we’re faced and at the mercy of the elements. Your time-lapse videos cannot have a rain break or take a day off when it gets messy. Construction sites often see their share of bad weather be it snow, rain, or dust. That’s exactly why you should pick a camera that has a durable and weather-hardy casing.
Cloud backup
When shooting a time-lapse video, you’re going to be dealing with a serious amount of pictures. These pictures require huge memory to be stored someplace. You should have a minimum of 128GB of internal storage.
However, hard disk drives and local storage is prone to be damaged or stolen. That’s why you need a combo of local storage and a cloud backup! Choose a camera that can connect to the web and upload pictures to the cloud.
Remote viewing
An ideal timelapse camera should have a remote viewing functionality. You have to be sure that your camera is functioning and in its set position at all times, even when you aren’t present. That’s why this feature is so crucial for your time-lapse video production.
Stability
Last but not least, your camera should be stable. Some cameras can be mounted on walls with screws, others are just tied to a pole or other structure. If the camera moves, even slightly, there can be serious discrepancies in the end product, so stability is something you absolutely must include when choosing that ideal time-lapse device.
How to Choose Construction Time-Lapse Video Devices
When it comes to choosing a device, there are several groups we have to take into account. You can shoot timelapse videos with either an IP camera, a smartphone, a live-action camera, or your pro DSLR camera.
Each one of these devices comes with its set of pros and cons, so let’s look into them!
IP Camera
IP cameras are usually used for surveillance, but they’re perfect devices for large-scale project time-lapse videos. They can record for months or years on end, and won’t even cost you much. IP cameras can have amazing resolution and are fixed in position and you can set intervals for your time-lapse pictures. They are sometimes hard to get a hang on and understand the features, but a great solution for the buck.
Smartphone
Although you may be inclined to use your smartphone because of its great camera, it shouldn’t be considered an option for commercial purposes. Their shooting time is just a couple of hours (depending on the battery), and the quality won’t be that good despite those megapixels on your camera. Smartphones are handy, however, in that you can place them anywhere and get angles you normally couldn’t get with larger devices.
Action Camera
Now here is an often-chosen device for time lapses — at least your friendly neighborhood influencer will claim so. However, for large-scale construction projects, they won’t be as ideal, since their shooting time can be even lower than with your standard smartphone. They are compact and relatively small, so you can also get good angle coverage and will offer a clear resolution. They are tricky to be fixed in position, and usually, they’re shaken by the smallest things.
DSLR
Professional DSLR cameras are considered to be good options for time-lapse videos. Their shooting time is somewhat better than with your smartphone or action camera, but nowhere near that of an IP camera. You will get high-quality footage and clear resolution though. DSLRs don’t have a built-in time interval function and require work with images post-shooting.
Why IP Camera Is a Good Choice
Often corporations use and have readily available IP cameras around their premises and projects, and likely you have them too! They’re often used for surveillance purposes, but they make an awesome time-lapse video solution.
Let’s see why they’re a better choice than other devices we’ve mentioned.
They Can Be Used In Combo
With IP security cameras, you get coverage from multiple angles. Since they’re used for security you’ll likely have more than a few of them on your site, which means you can use all these positions to shoe in your time-lapse video.
They Have Security Features
An IP camera often serves as a security device, with its 24/7 recording ability your construction site is monitored at all times. Some of the best IP cameras include movement detection which allows them to spot threats efficiently.
They Allow Remote Control
You don’t have to be present (and you often can’t) on all of your construction sites at the same time. IP cameras come to aid, as they’ll emit a 24-hour feed to your mobile phone app or computer.
They Have A Built In Time-Lapse Function
Some IP cameras now have a built-in timelapse function. Seems like security cam manufacturers like Reolink have recognized the power of time-lapse videos. The only thing you need to do is set your camera in position and turn it on!
Camera Recommendation
Okay, so the IP camera is the obvious winner here. But which one to choose? What you want is, of course, to get the most bang for your buck, at the same time you want the features to be ideal. Luckily we have such a cam in mind!
And the winner is…..
Reolink 811A
This beast of an IP camera can be yours for less than $100! It has a 4k HD shooting resolution and a 5-time optical zoom for every nook and cranny of your construction project site.
Its power over ethernet connection allows the camera to have a constant supply and image transmission to the cloud. Of course. The camera comes with a built-in time-lapse function specifically built for the construction industry.
Set-Up Guide
Setting up an IP camera on your site may seem like a challenge. But, it’s never been easier to set up your camera with the extensive guides coming alongside them. The steps often include launching an app and navigating to the time-lapse section, after which you customize settings as per your preferences.
In these settings, you can also choose when the shooting will start and how long you want to take photos. If you’re selecting a more than one-day shooting sequence, you can also choose only daytime photos, or both day and night. After this, most apps will ask you about the shooting interval for your cameras.
Interval can be set from anywhere between 2 seconds and a few hours with IP cameras, but how can you calculate this and be sure you’re capturing the best quality?
Calculate Interval and Frame Rate
Construction IP time-lapse devices take pictures with much less frequency than your usual video which is around 24 frames per second. With time-lapse, you’re often taking a picture per hour. But how to choose an ideal frame rate for your time-lapse project?
Determine total shooting time
Let’s assume your project will take half a year or 180 days. Next, you’d want to define the shooting frequency. We always advise going with 600 seconds or a picture per 10 minutes. This will, however, largely depend on the activity at your construction site. If there’s a lot of motion you should opt for a more frequent shooting.
Calculate the number of daily photos
The formula is simple: you take the desired time and multiply it by 24 fps and then divide that by the total time. So, in our example, this would be 600 (minutes) * 24 fps / 180 days= 80 fps. This says that you’ll need 80 pictures a day!
The number of photos taken per hour
If you’re only shooting daytime photos, this means that on average you’ll have 8 hours of sunlight per day. This means 80 pictures / 8 Hours = 10 pictures per hour.
Calculate the interval
In our example your shooting interval is 60 min / 10 pictures = 6 minutes, so you’ll take a picture every 6 minutes.
Everything left to do is open camera settings and set your camera to take a picture every 6 minutes.
The Best Setup for Construction Time Lapse
To achieve the best possible result, you’d want to place and set up your cameras in the most optimal location and for the best frame. With that in mind here are a few things to think about.
Use multiple devices
When shooting with your IP cameras you’d want to employ your entire arsenal. There are amazing examples of beautiful construction time-lapses created from different corners and multi-camera shots that showcase the entire process and all the little details.
🎥Capture. Create. Showcase. — With Studio52!
Transform your project’s journey with Construction time lapse videos in Saudi Arabia and Dubai — crafted by Studio52, the region’s leading time lapse video company. From long-term construction to interior fit-outs, we deliver high-quality visuals that tell your story, engage your audience, and elevate your brand.
Capture every stage of your construction journey with the right timelapse camera and turn project progress into powerful visual stories.