
Table of Content
1.1 360Photos/Virtual Tours: A New Age Marketing Tool
Customer satisfaction is among the foremost priority for almost any business. And, for engaging the customers, 360 photos and virtual tours have proven to be a really effective tool. Along with eye-catching visuals and animations, virtual tours can reap even more benefits. Statistics have shown that websites with virtual tours are viewed 5-10 times longer than those without.
A 360-degree virtual tour is being extensively used by real estate, hospitality, education institutes, farms, events, and more. This basically means any kind of business can benefit from 360 virtual tours. Why you may ask? Because in today’s digital age there’s a very good chance that a potential customer for any business would first conduct basic online research before making any decision.
360-degree photography used to be tough to capture and post-process just about a few years ago. However, with advanced imaging solutions, it is no longer difficult to create 360 virtual tours of your own. The only catch here is that you need to think 360 degrees to deliver a perfect piece of engaging content for your audience!
With that being said, here’s how you can shoot 360 photos and create your own virtual tour. So, let’s get started!
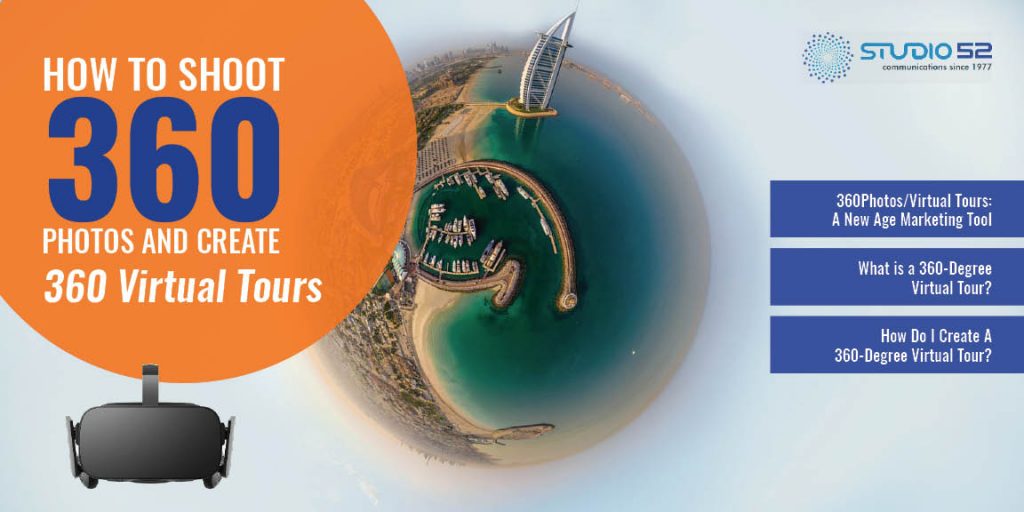
2.1 What is a 360-Degree Virtual Tour?
A virtual tour is a visual tool that replicates the experience of visiting and walking through a property, a destination, event, business, or an object. They allow prospective buyers to interact with the product or the site and look at the features in detail. These virtual tours are made up of a series of panoramic photos stitched together to produce one long, continuous shot.
Virtual tours are a perfect example of engaging content to make users want to stay longer on your website. These 360 virtual tours also give them the ability to get a much better idea of what you do, and what you are able to offer as a business.
3.1 How Do I Create A 360-Degree Virtual Tour?
Now that you understand the importance of 360 photographs and virtual tours, let’s get started with the process of creating one.
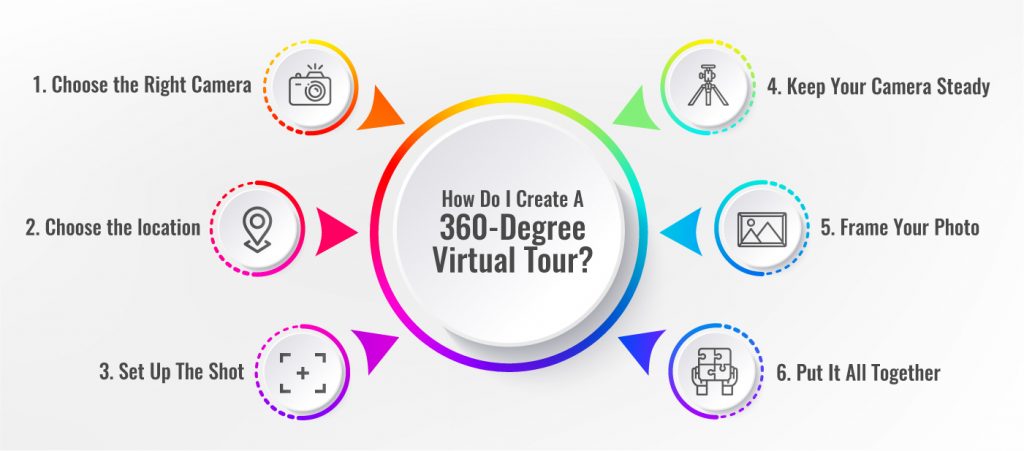
1.Choose the Right Camera
While there are special cameras designed for taking epic panoramic photos, we recommend shooting with a DSLR and creating the panorama with photo-stitching software. Panoramic cameras can be expensive unless you’re planning to shoot the Aurora Borealis, a DSLR will do just fine.
2.Choose the location
Positioning is very important with 360-degree panoramas. To frame your image correctly, you will have to use the initial position as a frame to direct and capture attention. Whatever the strategy you use to capture or direct the viewer, you need to shoot in a location that is interesting, so the viewer looks around in all directions to make the most of his/her experience. You’ll set the camera up here and take photos of everything from this one location.
3.Set Up The Shot
The placement of the camera depends on the kind of product and the technique that you are using. If you are using a DSLR with a fisheye lens and a tripod, the tripod must be on level ground so ensure your photos are all straight and not tilted. Shoot on full manual mode keeping exposure, focus, and white balance on manual. We recommend shooting your photos vertically. You can crop and edit the top and bottom of the image later while stitching the images.
4.Keep Your Camera Steady
It cannot be stressed enough how important a tripod is for 360-degree photography. It is hard to shoot even a regular panorama without a tripod! The tripod will provide you with a way to raise the camera up in the air to take the shots, eliminating yourself from the shots.
5.Frame Your Photo
360-degree panoramas are all about composing a view that would make it look as if you experienced it yourself. The point of view should be unique. It is always good to have a vantage point in your photos. Frame your photo well so a part of it contains a close view of the subject and the other part contains a stunning view.
And, finally, the most important thing, don’t forget to inspect your surroundings! As the camera picks everything in all directions, you may have to spend hours with a healing brush and clone tool to fix that accidental walk-in through the perfect shot.
6.Put It All Together
Last but definitely not least is the editing work. A little bit of Photoshop is all you need to fix the 360 photos you have taken. The finished images would import as a flat portrait with small imperfections like shadows. If you have the latest version of Photoshop you can convert these images into spherical panorama just by choosing 3D>Spherical Panorama>Export Panorama.
You can also use a smartphone app to work with panoramas.
So, that’s it! Creating 360 photos or virtual tours is as easy as that, which means there’s no reason for you now to not try out virtual tours on your own. Hope this post inspires you to try shooting some 360 panoramas. However, if you want a more professional approach and perfection to your 360 photos/virtual tours then you can give us a call at +9714-4541054 or contact us for more information.